Drawing Walls
If you have an existing structure joined to your deck, such as a garage, you can add walls to represent this structure first and then join the deck to it. Alternately, you can add a wall after designing the deck shape.
Adding a wall to the deck design adds a ledger board to the bill of materials and removes posts along the attached deck edges (visible in 3D view). After you add a wall, you can edit its materials as well as add windows and doors.
![]() Add a Wall before a deck
Add a Wall before a deck
| 1. | Click Add in the Home Ribbon. |
| 2. | Choose Freeform Wall from the menu. |
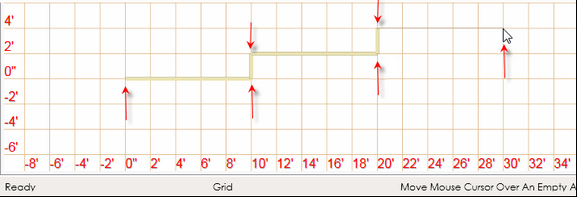
| 3. | Select the wall construction points in the design grid (see arrows). |
| 4. | Add a deck to the Freeform wall using the Freeform Deck command. |
![]() Add a Wall after a deck
Add a Wall after a deck
| 1. | Click Add in the Home Ribbon. |
| 2. | Choose Wall from the menu. |
| 3. | Click the deck edges that attach to the wall. |
NOTE: You can increase or decrease the length of the wall by dragging a wall grip point (represented by ![]() ).
).
![]() Add windows or doors
Add windows or doors
| 1. | Click Add in the Home Ribbon. |
| 2. | Choose Door or Windows from the menu. |
| 3. | Click the desired location on the wall for the door or window and click the left mouse button once to place the door or window. |
